
To make beef jerky in a food dehydrator, slice the meat thinly, marinate it in a mixture of seasonings, and then dry it in the dehydrator for several hours until it reaches the desired texture. Beef jerky is a popular and delicious snack that can be easily made at home using a food dehydrator.
By following a few simple steps below, you can create your own flavorful and tender jerky. We will guide you through the process of making beef jerky in a food dehydrator. From selecting the right cuts of meat to marinating and drying techniques, we will provide you with all the information you need to make perfect homemade beef jerky.
So, grab your dehydrator and let’s get started on this satisfying and savory journey of preparing your own beef jerky.
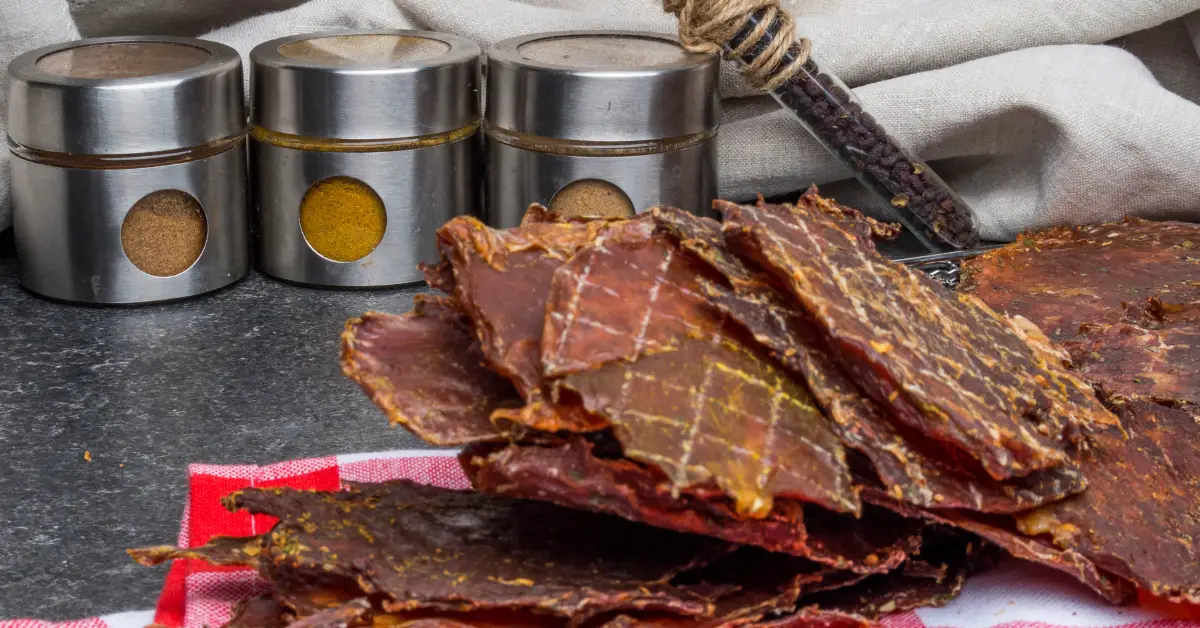
Credit: www.freshoffthegrid.com
Choosing The Right Cut Of Beef
Beef jerky is a delicious and convenient snack that can be enjoyed at any time. Making your own beef jerky in a food dehydrator is not only cost-effective but also allows you to have control over the ingredients used. One crucial step in the process of making beef jerky is choosing the right cut of beef.
The success of your jerky largely depends on selecting the appropriate meat, so let’s delve into the importance of selecting lean cuts and the recommended cuts for making beef jerky.
Importance Of Selecting Lean Cuts Of Beef For Jerky
When it comes to making beef jerky, opting for lean cuts of beef is essential. Here’s why:
- Lean cuts of beef have less fat content, making them ideal for jerky. Since fat goes rancid quickly, using lean meat helps in extending the shelf life of your jerky.
- Fat can also impair the dehydration process, resulting in a longer drying time and a less desirable texture for your jerky. By choosing lean cuts, you ensure a more efficient and consistent drying process.
- Choosing lean cuts of meat can also contribute to a healthier snack. Jerky made from lean beef is lower in calories and saturated fats, making it a great choice for those watching their waistline or looking for healthier snack alternatives.
Recommended Cuts And Their Characteristics For Making Beef Jerky
Now that we understand the importance of selecting lean cuts, let’s explore the recommended cuts of beef for making delicious jerky:
Sirloin: Sirloin is a popular choice for beef jerky due to its relatively low-fat content and good marbling. This cut of beef offers a good balance of tenderness and flavor, resulting in a satisfying chew.
Eye of round: Eye of round is a lean, boneless cut located on the rear leg of the beef. It is a popular choice for jerky as it is very lean and has minimal fat. Although slightly tougher than other cuts, it can still produce excellent jerky when properly marinated and sliced against the grain.
Flank steak: Flank steak is a flavorful cut that works well for beef jerky. It has a slightly higher fat content compared to other recommended cuts, but it offers a rich taste and tender texture. When slicing flank steak for jerky, it is crucial to cut against the grain to ensure a more tender and enjoyable eating experience.
Top round: Another lean cut that is commonly used for beef jerky is top round. It has less marbling, making it an excellent choice for those who prefer a leaner jerky. With proper marination and slicing against the grain, top round can yield delicious, chewy jerky.
Remember, when choosing the right cut of beef, it is crucial to consider the fat content, flavor, and tenderness. By opting for lean cuts such as sirloin, eye of round, flank steak, or top round, you can ensure the best possible results when making beef jerky in your food dehydrator.
Happy jerky making!
Preparing The Marinade
Importance Of Marinating The Beef To Enhance Flavor And Tenderness
Marinating is a crucial step in the beef jerky-making process as it not only enhances the flavor but also ensures the tenderness of the meat. Here are the key points to understand the importance of marinating:
Infusing flavor: Marinating helps to infuse the beef with a rich combination of flavors, adding depth and complexity to your jerky. The marinade acts as a seasoning agent that can incorporate various spices and ingredients, transforming the taste of the beef.
Tenderizing the meat: Marinating plays a significant role in tenderizing the beef. The acidic components in the marinade, such as vinegar or citrus juices, break down the muscle fibers, making the meat more tender and easier to chew.
Moisture retention: Marinating helps the beef retain moisture during the dehydration process. The liquid in the marinade penetrates the meat, preventing it from drying out and resulting in a juicy and delicious jerky.
Key Ingredients And Variations For A Flavorful Marinade
When preparing the marinade for beef jerky, it’s essential to choose the right ingredients to achieve a flavorful end product. Here are some key ingredients and variations to consider:
Soy sauce: A staple in most jerky marinades, soy sauce adds savory umami flavors and acts as a tenderizer due to its high salt content.
Worcestershire sauce: Adding a unique tang, Worcestershire sauce enhances the overall flavor profile of the jerky while providing an extra layer of umami.
Liquid smoke: If you want to capture the smoky taste typically associated with traditional jerky, liquid smoke can be a game-changer. It imparts a smoky aroma without the need for a smoking apparatus.
Sweeteners: To balance out the savory flavors, sweeteners like brown sugar, honey, or maple syrup can provide a hint of sweetness and create a well-rounded taste.
Spices and seasonings: Experiment with your preferred spices and seasonings to customize your marinade. Some popular options include garlic powder, onion powder, black pepper, chili flakes, and cayenne pepper.
Citrus juices: Citrus juices like lime, lemon, or orange can add a refreshing tang to your jerky marinade, pairing well with spicy or savory flavors.
Marinade Recipes For Different Flavor Profiles
Creating different flavor profiles for your beef jerky can be an enjoyable culinary adventure. Here are some marinade recipes to provide you with various taste options:
Classic teriyaki marinade:
- Soy sauce: 1/4 cup
- Worcestershire sauce: 2 tablespoons
- Brown sugar: 2 tablespoons
- Garlic powder: 1 teaspoon
- Sesame oil: 1 teaspoon
Spicy BBQ marinade:
- Bbq sauce: 1/4 cup
- Sriracha sauce: 1 tablespoon
- Brown sugar: 1 tablespoon
- Onion powder: 1 teaspoon
- Smoked paprika: 1 teaspoon
Citrus herb marinade:
- Orange juice: 1/4 cup
- Lemon juice: 2 tablespoons
- Olive oil: 2 tablespoons
- Dried thyme: 1 teaspoon
- Dried rosemary: 1 teaspoon
Feel free to experiment with these recipes by adjusting the ingredient quantities according to your taste preferences. Remember to let the beef marinate for at least 4 hours, or ideally overnight, to allow the flavors to develop fully.
So, now that you understand the significance of marinating, the key ingredients, variations, and even some marinade recipes, you’re all set to prepare flavorful and tender beef jerky in your food dehydrator.
Slicing The Beef
The Significance Of Slicing The Beef Thinly And Uniformly
When it comes to making beef jerky in a food dehydrator, one of the most critical steps is slicing the beef. The key to achieving delicious and tender jerky lies in cutting the meat thinly and uniformly. Here’s why it’s so important:
Thin slices ensure even drying: Thinly sliced beef allows for faster and more even drying in the food dehydrator. This consistency guarantees that all the slices will be ready at the same time, preventing some pieces from being under or overcooked.
Enhanced flavor absorption: Thinner slices of beef have more surface area, which means they can absorb marinades and spices more effectively. This results in a more flavorful and delicious end product.
Tender texture: Thinly sliced beef creates jerky with a tender, chewy texture. Thick slices can turn out tough and hard to bite into, detracting from the overall enjoyment of the jerky.
Techniques And Tools For Achieving The Desired Thickness
To ensure your beef jerky turns out perfectly, follow these techniques and use the right tools to achieve the desired thickness:
Chilling the beef: Before slicing, place the beef in the freezer for around 1-2 hours. Chilled meat is easier to handle and allows for cleaner, thinner slices.
Sharp knife: A sharp knife is essential for precise slicing. Choose a long, thin blade that can glide through the beef without tearing or crushing it. A serrated knife may work well for tougher cuts of beef.
Cutting against the grain: To achieve tender jerky, it’s crucial to cut the beef against the grain. Look for the lines of muscle fibers and slice perpendicular to them. This helps break down the meat’s natural toughness.
Consistency in slice thickness: Aim for slices that are approximately 1/8 to 1/4 inch thick. Using a ruler or a slicing guide can help maintain consistency throughout the process.
Tips For Easier And More Efficient Slicing
Slicing the beef for jerky can be a time-consuming task, but with these tips, you can make it easier and more efficient:
Partially freeze the meat: Along with chilling the meat beforehand, you can also partially freeze it before slicing. This firmer texture makes it easier to achieve thin, uniform slices.
Trim excess fat: Remove any excess fat from the beef before slicing. Fat can make the jerky greasy and affect its shelf life. Stick to lean cuts for the best results.
Utilize an electric slicer: If available, an electric slicer can make the slicing process much faster and more precise. These machines allow you to adjust the thickness to your desired level with ease.
Leverage pre-sliced meat: If you find slicing the beef challenging or time-consuming, you can often find pre-sliced meat specifically for making jerky at your local grocery store. This option saves both time and effort.
Remember, slicing the beef thinly and uniformly sets the foundation for creating high-quality beef jerky. Follow these techniques, use the right tools, and make use of these helpful tips to ensure your homemade jerky turns out delicious and satisfying.
Marinating The Beef
Proper Techniques For Marinating The Beef For Optimal Flavor Absorption
Marinating beef is a crucial step in the process of making delicious beef jerky. This is when the meat soaks up all the flavors from the marinade, resulting in a mouthwatering taste that you’ll love. To ensure your beef absorbs the marinade perfectly, follow these proper techniques:
Choose the right cuts of beef
Opt for lean cuts such as top round, eye of round, or flank steak. These cuts have less fat and will absorb flavors more effectively.
Slice the beef thinly
Thin slices of beef will soak up the marinade more quickly and evenly. Use a sharp knife to cut the meat into slices that are about 1/8 to 1/4 inch thick.
Score the beef
Lightly score the surface of the beef with a knife. This will allow the marinade to penetrate the meat more deeply.
Use an airtight container or resealable bag
Place the sliced beef into a container or bag, ensuring there is enough room for the marinade to surround the meat evenly.
Prepare a flavorful marinade
Use your favorite combination of ingredients to create a delicious marinade. Common ingredients include soy sauce, Worcestershire sauce, liquid smoke, honey, garlic powder, onion powder, and black pepper.
Marinate for an adequate amount of time
Depending on your preference, marinate the beef for at least 4 hours or up to 24 hours in the refrigerator. The longer the margination time, the more intense the flavors will be.
Rotate the beef
While marinating, gently toss or flip the meat every few hours to ensure even distribution of the marinade. This will help every slice of beef to soak up the flavors equally.
Keep it refrigerated
Proper refrigeration is essential to prevent the growth of bacteria. Always marinate the beef in the refrigerator to ensure food safety.
Remember, marinating beef requires a little patience, but the results are worth it. Following these proper techniques will allow the flavors to penetrate the meat thoroughly, resulting in perfectly seasoned and delicious beef jerky. So, get creative with your marinade and let the beef soak up all that flavor goodness!
Preparing The Food Dehydrator
Understanding The Setup And Functionality Of A Food Dehydrator
A food dehydrator is a useful kitchen appliance that can be used to make delicious beef jerky. Before you begin the process of making beef jerky in a food dehydrator, it’s important to understand its setup and functionality. Here are some key points to keep in mind:
- The dehydrator consists of trays or racks where you place the food for drying. The number of trays may vary depending on the model you have.
- There is a heating element in the dehydrator that generates the necessary heat for drying the food.
- The dehydrator also has a fan that circulates the hot air evenly, ensuring that all the trays receive consistent heat.
- Some dehydrators come with adjustable temperature settings, allowing you to control the drying temperature according to the recipe or food item you are dehydrating.
- The setup usually includes a timer feature that helps you keep track of the drying process and prevent over or under drying.
Selecting Appropriate Drying Racks Or Trays For Beef Jerky
When making beef jerky in a food dehydrator, selecting the right drying racks or trays is crucial for efficient and effective dehydration. Consider the following points:
- Look for trays or racks that have a mesh or perforated surface. This allows for proper air circulation and ensures even drying of the beef jerky.
- The size and spacing of the trays should be suitable for the quantity of beef jerky you intend to make. Make sure there is enough space between the trays to allow air to circulate freely.
- Consider using non-stick or silicone-coated racks to prevent the beef jerky from sticking and facilitate easy removal.
- If your dehydrator does not come with enough trays, you can purchase additional ones separately, keeping in mind the compatibility with your specific dehydrator model.
Tips For Ensuring Efficient And Safe Dehydration
Efficient and safe dehydration is essential when making beef jerky in a food dehydrator. Follow these tips for optimal results:
- Slice the beef into thin, uniform strips before placing them on the drying trays. This will promote even drying and reduce the overall drying time.
- Marinate the beef slices in your desired seasoning or marinade mixture before drying. This enhances the flavor and tenderizes the meat.
- Arrange the beef slices in a single layer on the drying trays, ensuring that they are not overlapping. This allows for proper airflow and prevents uneven drying.
- Rotate the trays during the drying process to ensure uniform dehydration. This helps to dry the jerky evenly from all sides.
- Regularly check the internal temperature of the beef jerky using a food thermometer to ensure it reaches a safe internal temperature of 160°f (71°c) before consumption.
- Clean the food dehydrator thoroughly after each use to prevent bacterial growth and maintain its efficiency.
Remember, understanding the setup, selecting appropriate drying racks, and following these tips for efficient and safe dehydration are key to making delicious beef jerky using a food dehydrator. So go ahead, get creative with your seasonings, and enjoy your homemade beef jerky!
Loading The Food Dehydrator
So, you’ve gathered all the necessary ingredients and equipment, and you’re ready to make your own delicious beef jerky in a food dehydrator. The next step is to properly load the food dehydrator with the beef slices, ensuring maximum drying efficiency and air circulation.
Here’s how you can do it effectively:
Proper arrangement and positioning of the beef slices on the drying racks
- Lay the beef slices in a single layer on the drying racks, avoiding any overlap. This will allow the air to circulate evenly around each slice, ensuring uniform drying.
- Position the larger, thicker slices towards the back of the dehydrator and the smaller, thinner slices towards the front. This slight variation in positioning helps the beef jerky to dry evenly.
- Leave some space between the beef slices on the racks to allow air circulation. Too close together, and the slices may not dry properly.
- Rotate the drying racks during the drying process, especially if you have a dehydrator with a rear-mounted fan. This helps to ensure even drying, as the slices closest to the heat source may dry faster.
Maximizing drying efficiency and air circulation
- Leave sufficient space between the drying racks to allow for proper air circulation. This ensures that the warm air can flow freely around the beef slices, facilitating faster and more efficient drying.
- Avoid overcrowding the dehydrator with too many racks or too much beef slices. Overcrowding can hinder air circulation, leading to uneven drying and longer drying times.
- Place the racks in the dehydrator in such a way that the air can flow unobstructed. Ensure that there is enough clearance between the racks and the walls or other components of the dehydrator.
- Consider using a non-stick or silicone mesh sheet on each rack to prevent the beef slices from sticking and improve airflow.
Utilizing multiple racks effectively
- If your food dehydrator comes with multiple racks, make sure to use them effectively to maximize your jerky-making process.
- Load each rack with beef slices, maintaining the proper arrangement and positioning as mentioned earlier.
- Rotate the racks occasionally during the drying process, particularly if you’re using a dehydrator with side-mounted fans. This helps to ensure that each rack receives equal heat and airflow for consistent drying results.
- If you have excess beef slices and not enough racks, you can remove one of the racks temporarily to make space for more slices. Just be sure to rotate the racks appropriately to ensure even drying.
By following these loading techniques, you’ll ensure the proper arrangement and positioning of the beef slices on the drying racks, maximize drying efficiency and air circulation, and effectively utilize multiple racks in your food dehydrator. Happy jerky-making!
Setting The Dehydrator Temperature And Time
Understanding Ideal Temperature Range For Beef Jerky
The temperature at which you set your food dehydrator plays a crucial role in making perfect beef jerky. Here’s what you need to know about the ideal temperature range:
- The recommended temperature range for beef jerky is typically between 145°f (63°c) and 165°f (74°c). This temperature range ensures that bacteria and other pathogens are killed during the drying process, making the jerky safe to eat.
- Setting the dehydrator at a higher temperature helps to speed up the drying process, but it may result in the jerky becoming too dry or overcooked.
- It’s important to avoid setting the temperature too low as this can lead to the growth of bacteria on the meat.
Factors To Consider When Determining Drying Time
The drying time for beef jerky can vary depending on various factors. Here are some key factors to consider when determining the drying time:
The thickness of the jerky slices: Thicker slices will require a longer drying time compared to thinner ones.
The moisture content of the meat: If the meat has a higher moisture content, it will take longer to dry.
Humidity levels: If you live in a humid environment, it may take longer for the jerky to dry completely. It’s best to dehydrate the jerky on a dry day or use a dehumidifier in the drying area.
The efficiency of your food dehydrator: Each dehydrator may have different heat distribution and air flow, which can affect the drying time. It’s recommended to follow the manufacturer’s instructions and adjust the drying time accordingly.
Experimenting With Different Drying Settings For Desired Texture And Taste
Achieving the perfect texture and taste for your beef jerky requires some experimentation with different drying settings. Here are some tips to help you with the process:
- Start with the recommended temperature range of 145°f (63°c) to 165°f (74°c) and observe the drying time needed for your desired texture. However, if your preference is for a chewier jerky, you can try lower temperatures, and for a drier jerky, higher temperatures can be experimented with.
- Adjust the drying time based on the thickness of the jerky slices. Thicker slices will need more time, while thinner slices will dry faster.
- Regularly check the jerky during the drying process to monitor its progress. It’s important to remove the jerky from the dehydrator when it is still slightly flexible but has no moisture remaining.
- To enhance the flavor, you can try marinating the beef before dehydrating. Experiment with different marinades and seasonings to find your favorite combination.
- Keep a record of the temperature, drying time, and results for each batch. This will help you replicate successful batches in the future and make adjustments if needed.
Remember, finding the perfect temperature and drying time for your beef jerky may require some trial and error. Enjoy the process of experimenting and discovering your own unique and delicious jerky recipe.
Monitoring And Flipping The Beef
When it comes to making beef jerky in a food dehydrator, monitoring and flipping the beef slices during the drying process is crucial to achieve a perfectly dried and flavorful jerky. Here are some important points to keep in mind:
Importance Of Regularly Checking The Progress Of The Drying Process
- Regularly monitoring the drying progress allows you to ensure that the jerky is drying evenly and prevent any undercooked or overcooked portions.
- Checking the beef slices periodically helps you identify any signs of spoilage or mold growth, ensuring that the jerky is safe to consume.
- It allows you to make necessary adjustments to the drying time and temperature if required, ensuring optimal results.
Tips For Flipping The Beef Slices To Ensure Uniform Drying
- Flip the slices halfway through the drying process, usually around the 4-6 hour mark, to ensure both sides of the beef are evenly dried.
- Use clean tongs or a spatula to gently flip the slices, taking care not to bend or break them.
- Pay attention to any thicker or unevenly sized slices, as they may require more time or flipping to ensure uniform drying.
- As you flip the slices, observe their color, texture, and flexibility to gauge the drying progress and make any necessary adjustments.
Adjusting Drying Time And Temperature If Necessary
- Factors such as humidity levels and thickness of the beef slices can affect the drying time and temperature required.
- If you notice that the beef jerky is not drying evenly or is taking too long to reach the desired texture, consider increasing the drying time or temperature slightly.
- On the other hand, if the jerky is drying too quickly and becoming brittle, decrease the drying time or temperature to prevent overcooking.
- It’s important to find the right balance between drying the jerky thoroughly and maintaining its tenderness.
Remember, making beef jerky in a food dehydrator requires regular monitoring, flipping the slices, and making adjustments when necessary. By following these simple steps, you’ll be able to create delicious homemade beef jerky that is perfectly dried and full of flavor.
Testing For Doneness
Indicators To Look For When Determining If The Beef Jerky Is Fully Dried
When it comes to making beef jerky in a food dehydrator, one of the most crucial steps is determining its doneness. Properly dried beef jerky is not only safe to consume but also ensures a tasty and enjoyable snacking experience.
Here are some key indicators to look for when testing if your beef jerky is fully dried:
Appearance
The beef jerky should have a dry and leathery texture, with no visible moisture or oily spots on the surface. It should feel firm to the touch and easily break apart without any bending or flexing.
Flexibility
Fully dried beef jerky should be rigid and stiff. When you bend a piece of jerky, it should crack or snap instead of bending or tearing. This indicates that the moisture content has been sufficiently reduced.
Color
A well-dried beef jerky should have a consistent color throughout, ranging from dark brown to red, depending on the seasoning and marinade used. Any areas that appear darker or wetter may need further drying.
Texture
The texture of fully dried beef jerky should be chewy but not tough or hard. It should require a bit of effort to tear and chew, but it shouldn’t be so tough that it becomes difficult to enjoy.
Moisture content
One of the best ways to ensure the safety of your beef jerky is by properly testing for moisture content. Use a food dehydrator with adjustable temperature settings and follow the manufacturer’s guidelines for beef jerky preparation. Aim for a moisture content of about 15% or less to inhibit the growth of bacteria and other pathogens.
Internal color
Cutting into a piece of beef jerky will reveal its internal color. The meat should be uniformly tan or brown, indicating that it has been thoroughly dried. Any areas that appear pink or red may signify under-drying and should be returned to the dehydrator for further processing.
By paying attention to these indicators, you can confidently determine if your beef jerky is fully dried and ready to enjoy. Keep in mind that the drying time can vary depending on the thickness of the slices and the specific dehydrator used.
Regularly checking the jerky’s progress and adjusting the drying time accordingly will help you achieve the perfect texture and flavor for your homemade beef jerky.
Storing And Preserving Beef Jerky
Best Practices For Storing And Protecting Homemade Beef Jerky
Whether you’ve made a big batch of homemade beef jerky for snacking or are planning on making it for future use, proper storage is crucial for maintaining its freshness and taste. Here are some best practices to ensure your beef jerky stays in optimal condition:
Store it in airtight containers: Use airtight containers like glass jars, resealable bags, or vacuum-sealed bags to prevent air and moisture from getting in. This will help preserve the flavor and texture of the beef jerky.
Remove excess moisture: Before storing, make sure the beef jerky is completely dry. Pat it dry with a paper towel to remove any lingering moisture that could lead to spoilage.
Keep it in a cool, dark place: Store the beef jerky in a cool and dark area away from direct sunlight and heat sources. Exposure to light and heat can cause the jerky to spoil faster and lose its quality.
Avoid contact with air: Whenever you open the storage container, try to minimize the contact between the beef jerky and air to prevent oxidation. Re-seal the container tightly after each use.
Consider using desiccant packs: To further extend the shelf life of your beef jerky, you can place desiccant packs inside the storage containers. These packs are designed to absorb excess moisture and can help maintain the jerky’s crispness.
Recommended Storage Containers And Techniques For Preserving Freshness
Choosing the right storage container and employing proper techniques can significantly contribute to keeping your homemade beef jerky fresh and flavorful. Here are some recommended options:
Glass jars with airtight lids: Glass jars not only offer effective protection against air and moisture but also allow you to see the contents easily. Opt for jars with airtight lids to create a sealed environment for preserving your beef jerky.
Resealable bags: Resealable bags designed for food storage, such as ziplock bags, are convenient and cost-effective choices. Make sure to press out any excess air before sealing the bag to maintain freshness.
Vacuum-sealed bags: If you have a vacuum sealer, using vacuum-sealed bags can help prolong the shelf life of your beef jerky. Removing the air from the bag creates an oxygen-free environment that prevents spoilage.
Freezer storage: If you’re planning to store the beef jerky for an extended period, freezing is an excellent preservation method. Place the jerky in airtight containers or vacuum-sealed bags and ensure the freezer temperature is set to 0°f (-18°c). Properly stored, beef jerky can last several months in the freezer.
Keep in mind that each storage option has its advantages, so choose one that best fits your needs and available resources.
Shelf Life And Considerations For Long-Term Storage
Knowing the shelf life of your beef jerky and understanding the factors that affect its longevity can help you plan for long-term storage. Consider the following:
Shelf life: Homemade beef jerky, if stored properly, can last for several weeks to a few months. It’s essential to consume it within this time frame to enjoy the best quality and taste.
Moisture content: The lower the moisture content of your beef jerky, the longer it will last. Drying the jerky thoroughly and using desiccant packs can help reduce moisture and extend its shelf life.
Quality degradation: Over time, the flavor and texture of beef jerky may deteriorate due to oxidation and the breakdown of fats. While it may still be safe to eat, it might not taste as fresh or have the desired texture.
Regular inspection: Periodically check your stored beef jerky for any signs of spoilage, such as mold, discoloration, or an off smell. If any of these are present, it’s best to discard the jerky to avoid any potential health risks.
By following these storage guidelines and understanding the factors affecting shelf life, you can ensure that your homemade beef jerky remains delicious and safe to consume for as long as possible.
Enjoying And Flavoring Beef Jerky
Exploring Different Ways To Enjoy Beef Jerky As A Snack Or Ingredient
Beef jerky is not just a tasty snack on its own, but it can also be used in various creative ways to enhance the flavors of your favorite dishes. Here are some ideas to explore:
On-the-go snack: Enjoy beef jerky as a convenient and protein-packed snack while hiking, camping, or on road trips.
Charcuterie board: Add sliced beef jerky alongside cheeses, crackers, and dried fruits on a charcuterie board for a unique twist.
Trail mix: Mix beef jerky with nuts, dried fruits, and chocolate chips to create a savory and sweet trail mix for a quick energy boost.
Salads: Chop beef jerky into bite-sized pieces and toss it into your favorite salad for an added protein kick and a burst of savory flavor.
Sandwiches and wraps: Layer thin strips of beef jerky in your sandwiches or wraps for a satisfying crunch and a smoky taste.
Stir-fries: Incorporate beef jerky into stir-fries by rehydrating it in a savory sauce before adding it to vegetables and noodles.
Pizza topping: Sprinkle crumbled beef jerky on top of your favorite pizza for a unique and flavorful twist.
Omelets and scrambles: Fold in chopped beef jerky into your omelets or scrambles for a protein-packed breakfast with a savory kick.
Pasta dishes: Add sliced beef jerky into pasta dishes like carbonara or bolognese for an extra burst of umami flavor.
Homemade granola bars: Mix chopped beef jerky with oats, honey, and dried fruits to create homemade granola bars that are perfect for snacking on the go.
Ideas For Adding Extra Flavors And Seasonings To Homemade Beef Jerky
Making beef jerky at home allows you to experiment with different flavors and seasonings to customize it to your taste. Here are some ideas to enhance the flavor of your homemade beef jerky:
Marinades: Create a marinade using ingredients like soy sauce, Worcestershire sauce, honey, garlic, and various spices to infuse your beef jerky with a delicious blend of flavors.
Spice rubs: Coat your beef strips with a dry spice rub made from a combination of chili powder, paprika, cumin, onion powder, and other spices to add a flavorful kick to your jerky.
Sweet and savory: Combine sweet and savory flavors by adding ingredients like brown sugar, maple syrup, teriyaki sauce, or pineapple juice to your marinade for a delicious combination of tastes.
Smoky flavor: Use liquid smoke or smoked paprika in your marinade or spice rub to give your beef jerky a rich, smoky flavor reminiscent of traditional smoked meats.
Fruity twist: Experiment with adding fruit juice, such as apple or pineapple, to your marinade for a touch of natural sweetness and tanginess.
Incorporating Beef Jerky Into Meals And Recipes
Beef jerky can be a versatile ingredient that adds depth and texture to various dishes. Here’s how you can incorporate beef jerky into your meals and recipes:
Homemade beef jerky trail mix
Combine chopped beef jerky with your favorite nuts, dried fruits, and seeds to create a protein-packed trail mix that’s perfect for snacking or as a grab-and-go breakfast option.
Beef jerky tacos
Fill soft tortillas with sliced beef jerky, creamy avocado slices, shredded lettuce, and your favorite taco toppings for a savory and satisfying meal.
Beef jerky stir-fry
Add rehydrated beef jerky to stir-fried vegetables, along with a flavorful sauce, for a quick and protein-packed dinner option.
Beef jerky pasta
Toss chopped beef jerky into a creamy pasta dish or sprinkle it on top of spaghetti marinara for an added burst of flavor and texture.
Beef jerky stuffing
Crumble beef jerky and incorporate it into your stuffing recipe for a unique twist on classic holiday dishes.
Cheesy beef jerky bites
Roll sliced beef jerky with cream cheese, cheddar, or any other cheese of your choice, and bake them until the cheese is melted for a delicious and savory appetizer.
Beef jerky pizza
Sprinkle sliced beef jerky on top of your homemade pizza, along with your favorite toppings, for a tasty and adventurous pizza experience.
Beef jerky breakfast hash
Use chopped beef jerky in a breakfast hash by combining it with diced potatoes, onions, and peppers, and cook it until everything is crispy and golden-brown.
Beef jerky stuffed mushrooms
Fill mushrooms caps with a mixture of chopped beef jerky, cream cheese, and spices, and bake them until they’re tender and delicious.
With these ideas for enjoying beef jerky as a snack, adding extra flavors, and incorporating it into meals and recipes, you can explore the versatility of this savory treat. Get creative in the kitchen and enjoy the unique taste and texture of homemade beef jerky in various ways.
Frequently Asked Questions
How Long Does It Take To Make Beef Jerky In A Food Dehydrator?
The time it takes to make beef jerky in a food dehydrator can vary depending on factors such as meat thickness and moisture content. On average, it takes about 4 to 6 hours of dehydration time for perfectly dried beef jerky.
Is It Necessary To Marinate The Meat Before Dehydrating?
Marinating the meat before dehydrating is highly recommended as it adds flavor and tenderizes the jerky. You can marinate the meat using a combination of salt, pepper, soy sauce, Worcestershire sauce, and your desired spices and herbs.
Can I Use Any Type Of Meat For Making Beef Jerky?
While beef is the most commonly used meat for making jerky, you can also use other meats like turkey, chicken, or venison. It’s important to choose lean cuts of meat with minimal fat as excess fat can cause spoilage during the dehydration process.
Conclusion
To wrap things up, making beef jerky in a food dehydrator is a simple and satisfying process. By following the steps outlined in this blog post, you can create delicious jerky that is both healthy and flavorful. Remember to choose lean cuts of beef and marinate them with your favorite seasonings for added taste.
The food dehydrator will remove the moisture from the meat, resulting in a shelf-stable snack that can be enjoyed anytime, anywhere. Whether you’re a seasoned jerky enthusiast or a beginner looking to try something new, this method is sure to impress.
So, gather your ingredients, fire up the food dehydrator, and start making your own homemade beef jerky today. Delight your taste buds and impress your friends and family with your homemade creation. Happy jerky-making!